Monthly Archives: August 2014

Two Months

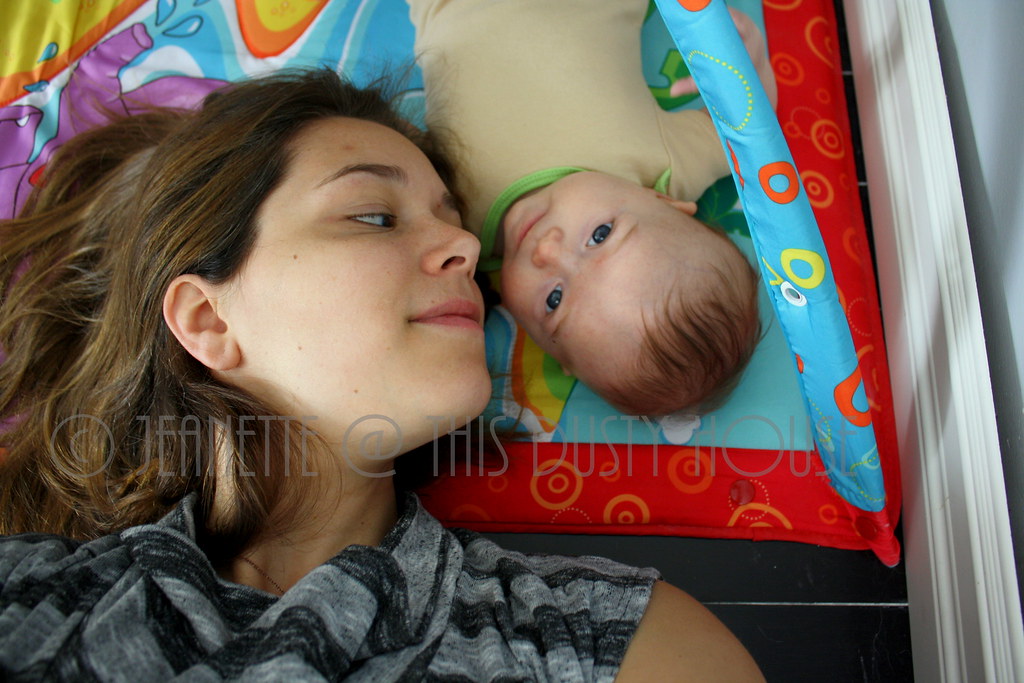
Sometimes, as I nurse at 2 am, or coax out a giggle or two at 10 in the morning, or pace up and down the length of the house trying to calm purple crying at 6 in the evening, I get hit with that surreal, ‘this is my life’ feeling. This is my baby. I hardly remember it, but two months ago, I gave birth to a human being. I don’t feel like one and yet, I am a mom. 
Mom. The word itself is surreal. 
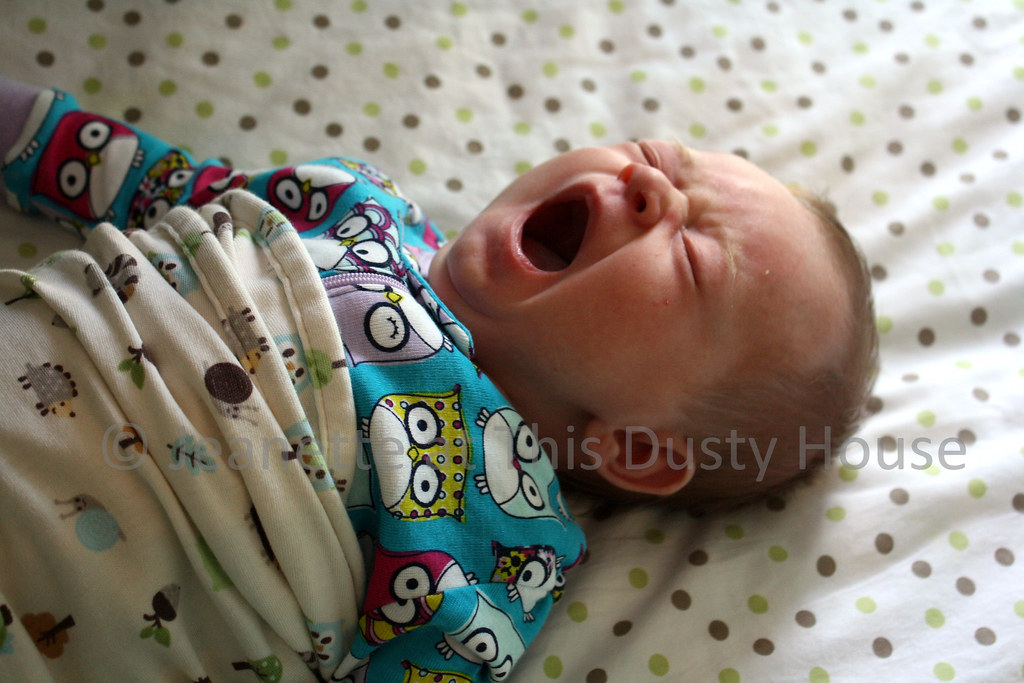
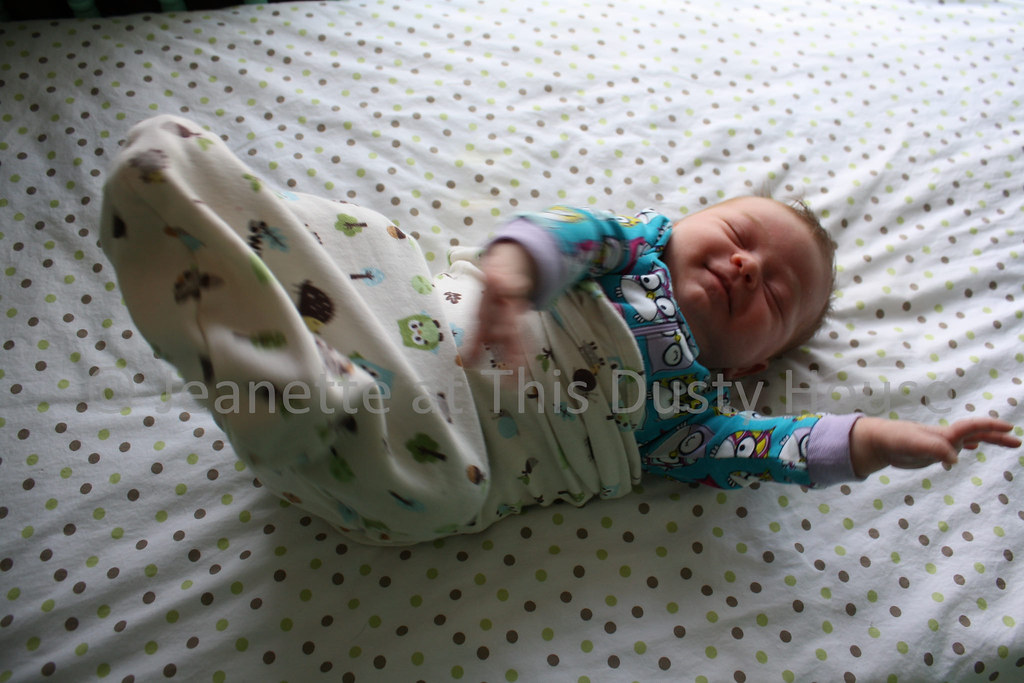
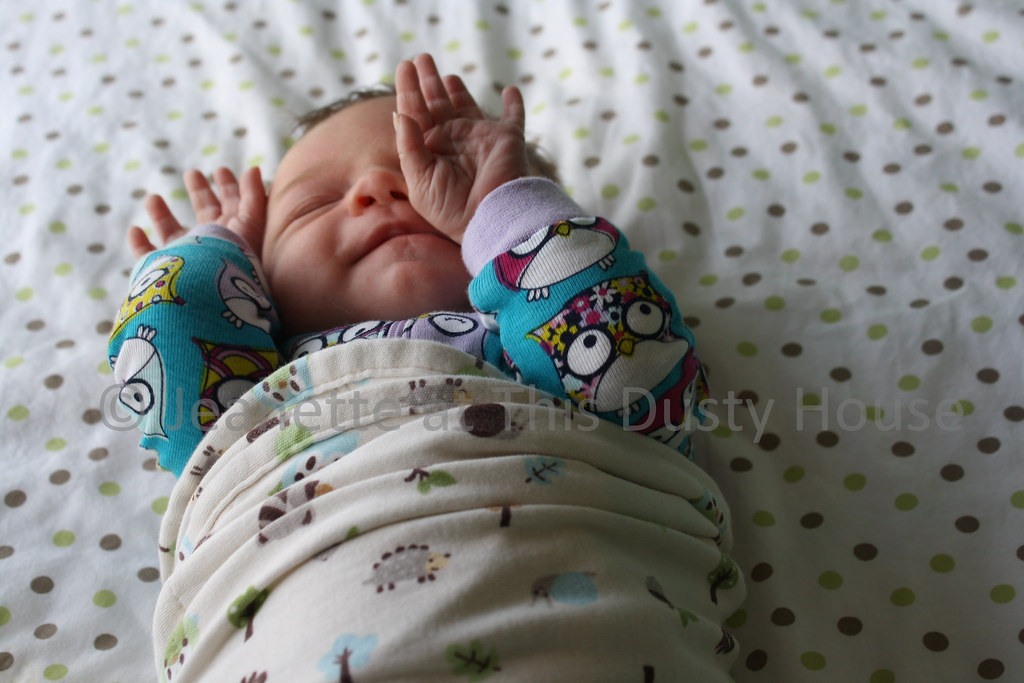
On Sunday, Isabel was 2 months old. 
Sleeping: Her schedule hasn’t changed much since the first few weeks after we brought her home. She still wakes up at 2 or 3 in the morning, and again at 5 or 6. I try to remind myself that this is a good thing, that she’s eating well and therefore growing well, but more and more, I find myself bringing her into our bed so I can feed her without the fear of falling asleep in the rocking chair and dropping her. 
(I almost did once. It scared me.)
Eating: Still lots. Every 2-3 hours, except at night, when she does one 4-5 hour stretch. 
Pooping: The third of the trifecta of baby activities… We have officially made the switch over to cloth diapers, and I have begun to understand the obsession cloth diapering moms have with the whole thing. But, that deserves a whole blog post of its own, I think.
Growing: Beautifully! I notice the changes in her almost every day. At her two month check up, she was 11.6 lbs and 59 cm long (about 23 inches). 
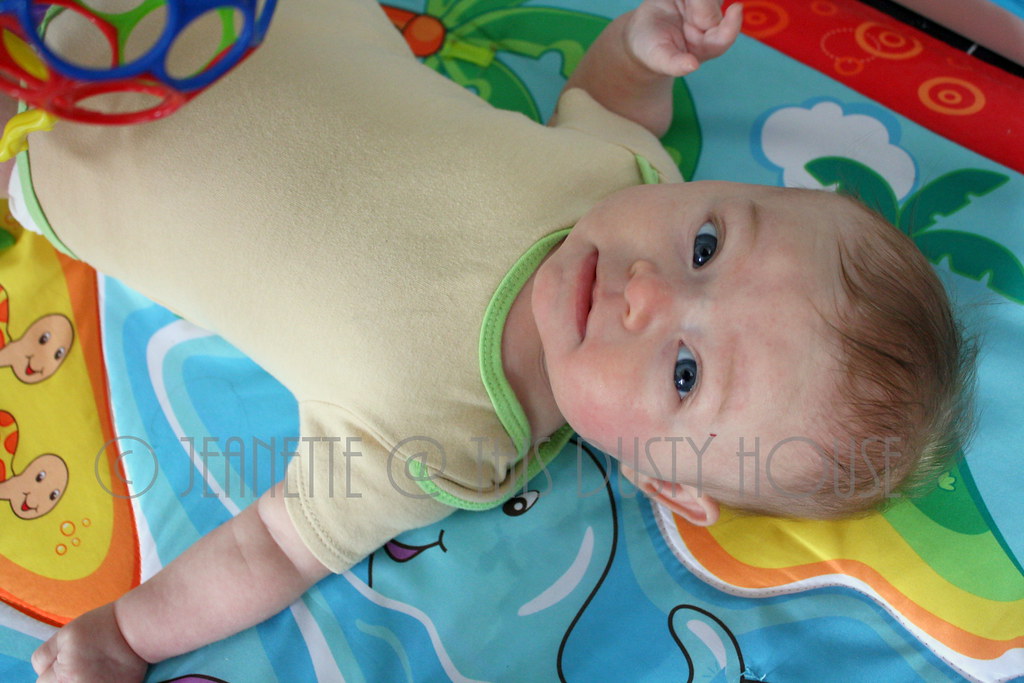
Playing: Oh, she plays! We’ve borrowed a play mat from a friend. Daily, I plop her under a colourful array of balls and hanging toys and can’t help but to stare, mesmerized, as she kicks and wiggles and smiles and laughs up at the colours hanging above her head. She’s discovered her reflection in the little mirror and will stare at herself for a solid 10 minutes.
And me? 
I’m headed back to school next week. On one hand, I’m excited. On the other hand, I am beyond apprehensive and kind of wish I could take back my tuition money and stay tucked in this life of baby snuggles and domesticity. 

1 Comment

Filed under baby, Isabel

Time To Paint: A Look Back

I don’t do the painting in our house much. More often than not, it’s the Husband picking up the paint brush. He spent a summer or two during high school painting with the pros on a team of house painters, so it never makes much sense for me to get in his way. I learned this the very first time we painted anything together. We picked the colour for our very first bedroom together, but I quickly found the magic of togetherness disappeared as I rolled the brown paint on my brush and faced the empty wall. He whipped through the first coat of the second colour before I had hardly clumsily finished a quarter of my single accent wall. Since then, while I’ve helped him out in miniscule ways – cutting in half a room, starting the rolling until he’s ready to take over – the first time I actually picked up a brush and roller on my own incentive, without his speed to back me up, was a mere two months ago. Even then, I had my mom’s help and many years of painting experience to back me up.

I don’t paint a lot.

However, we have a whole house to paint these days. We’ve lived with patches and paint splotches on the wall for long enough and, since I’m home during the day anyway, it’s time for me to grit my teeth and get to work. I know that in the end, it will be worth it. Thinking back on all my scattered painting experiences, I’m going to be trying to follow a few simple rules in order to get the job done, more or less by myself.

1. Don’t get ahead of myself. Prep work is important. Making sure the walls have been sanded smooth and are ready to go before I start painting will be crucial to a good paint job. We have a number of patches to sand down, so this step might take me a while.

2. Start with the ceilings and the trim. This will allow me to do these kind of difficult parts quickly, not worrying about cutting in perfect lines or ruining carefully painted walls.

3. Work in small sections. Cut in a section, then paint the wall. Painting wet paint over wet paint will ensure a smooth wall. Otherwise, you might be able to see where I cut in and where I rolled.

4. Go slow, take breaks, and drink lots of water. Painting is hard. At least, I have always found it hard. I’m going to need to give myself regular breaks if I want to get the job done, especially since Isabel is going to need to be fed and diaper changed every few hours. This is not going to be a one day job! But, slow and steady, it will get done, right?

Recently, Benjamin Moore sent me a ben & Me kit to get me going. The kit is essentially everything I need to get the job done, from drop cloths, to rollers, to paint trays, to brushes. It even includes a little how-to guide to help me through on my own, and the Benjamin Moore website is chalk full of inspiration to help me finally make a decision on paint colour. (Check it out for some new colour inspiration and lots of painting tips and tricks!) So, I have no excuse – as long as Isabel naps like a champ, that is.

Although this post has been generously sponsored by Benjamin Moore, the opinions and language are all my own, and in no way do they reflect Benjamin Moore.

Leave a comment

Filed under painting

This Dusty Kitchen: Garden Vegetable Quiche

Postpartum eating has been confusing. On one hand, I have approximately 15 pounds of extra to lose in order to get back to my pre-baby weight and a healthy BMI. I’ve lost weight before by counting calories and increasing my activity levels, so getting rid of it doesn’t really worry me. Except, on the other hand, I’m breastfeeding, and diet restrictions and dehydration can all affect milk supply.

Surprise, surprise, I care a whole lot more about feeding my daughter than I do about my waist size. Counting calories is out, and I have to learn a new way to get back to my previous healthy weight. (Besides, counting calories isn’t the healthiest way to lose weight anyway, right?) This means a renewed focus not on energy content, but nutrition, no fear of healthy fats, with an eye on portion control.

Quiche is not diet food. Anything with pastry doesn’t really fit in that category, and considering the amount of cream mixed in with the egg in the recipe, not to mention the cheese, this recipe is likely not light on calories. But, it is full of protein – eggs! – and with lots of veggies mixed in, it was the perfect tasty dinner to keep me full and satisfied through my evening 5K run, right to bed time.

This quiche was also a bit of a product of my garden. I needed a recipe that could use up the dozens of cherry tomatoes that came off our single cherry tomato plant, and make use of some of the huge zucchini I found among the weeds this week.

This was the first quiche I’ve ever made. Now, I wonder why I waited so long. Simple enough to make during Isabel’s nap time, delicious enough to feel gourmet, cheap enough to fit our post-baby, tuition-looming finances, quiche may have to become part of my regular meal rotation.

Garden Vegetable Quiche
Adapted from The Joy of Cooking and The Betty Crocker Recipe Card Library

Make the crust. Using a pastry cutter or your hands, mix together 1/2 cup cold butter, margarine, shortening or lard1 cup whole wheat flour, and 1/2 tsp salt until pea-sized.

Over the mix, sprinkle approximately 3 tbsp cold water. Mix to incorporate the water just until the dough is holding together.

Now, you can turn the dough out onto your counter and use a proper rolling pin to roll it out nice and thin. Or, you can do what I did and dump it directly into your pie pan and use your fingers to press it thin, up the sides of the pan. You won’t get a beautiful crust this way, but it’s quick and does the job.

Over the crust, spread 1 onion, chopped, as many cherry tomatoes as desired, cut in half, approximately 1 cup shredded zucchini, and approximately 1 cup shredded cheese. Set aside to prepare the egg.

In a bowl, whisk 6 eggs with 1 cup 10% cream or 1 cup milk of your choice. (Obviously, milk will make this a lower calorie dinner.) Add in 1/2 tsp salt, 1/4 tsp sugar, and 1/8 tsp cayenne pepper.

Pour the egg mixture over the vegetables in the crust. Bake at 425 for 15 minutes, then reduce the temperature to 300 and continue to cooking for 30 minutes, or until a knife or fork comes out clean when stuck into the egg mixture about 1 inch from the crust.

5 Comments

Filed under food

A New Changing Station: Swallowing My Pride

A couple years ago, a good friend of the Husband bought all his roommate’s furniture and then promptly left the country, passing said furniture around to his friends to sell, use, or store as needed. We ended up with a bed frame and two huge bedside tables, none of which were my style, but both of which got incorporated into our home anyway. A few months ago, the matching dresser found its way into our garage, accompanied by a promise that the Husband would sell it as soon as possible and get it out of the way. I responded by washing my hands of the garage. It was officially his domain.

And then, I bought a stash of cloth diapers. Suddenly, my delicate, vintage, naturally shabby chic dresser didn’t cut it.

We were going to sell the dresser in the garage sale last weekend, but as the Husband prepared to lug it from the garage to the front, I swallowed my pride and stopped him. Turned out, he’d been feeling the exact same way about our diaper changing station. Even with disposable diapers, he said, there was no where to put anything down. Besides, perhaps even more than me, he really wanted to get the monster dresser out of the garage.

So, Tuesday night, we popped a soother in Isabel’s mouth, tucked her into her swing, and got to work. It was heavy. Awkward. And it would not fit up those stairs. It took us two tries to determine that there was no way we could wiggle it up the narrow passageway. All we needed was one more inch.

Cut off the legs, I said.

We can’t do that, the Husband said.

Yes we can. Cut them off. We don’t need them.

With some trepidation, the Husband pulled out his skill saw and cut the legs down approximately 2 inches, leaving a mere inch or so of leg behind. One more try. It was heavy. It was awkward. But, success! We made it, despite the gouges we left behind in the wall.

The dresser is still not really my style, but it fits our purposes a lot better, providing ample space on top for a comfortable diaper change and plenty of drawer space for my full cloth diaper stash, as well as a bunch of disposables. It also fits all of Isabel’s blankets, sleepers, and bibs; once I get to organizing, it will fit most of her clothes as well. Even better, every drawer only requires one hand to open – crucial for when I have a baby in my arms!

Now that we’ve officially made it ours by chopping off the legs, I’ve been thinking about what to do with it in order to make it more my style. Along with the new rocking chair, I’d like to paint or refinish it in some way. Paint it white, maybe, with some minty green on the drawers to match it to the crib? Or sand off the current finish and stain it dark, like the railing behind it or the dresser that used to sit in this space? New handles, definitely, but what style?

And now, I just have to find a place in our already full house for my pretty little vintage dresser – preferably not the garage!

10 Comments

Filed under nursery

How To Make a Ring Sling

Years ago, my brother went on a trip to India and brought me back a beautiful length of cloth. I tucked it away at the time, lacking faith in my abilities to sew something I would love forever. It moved with my twice, living in totes, and bags, and finally, tucked in a corner with my stash of yarn. I assumed I would always be too afraid to mar that fabric.

And then, I was introduced to the world of babywearing and found myself drooling over the beauty and function of ring slings. The prices, however? Not so much. It doesn’t take a lot of research to realize that ring slings are so easy to DIY though. As I started thinking about pulling out my sewing machine, I realized I had the perfect length of fabric for the project.

What do you need?

2.5 yards of fabric, though you can probably get away with just 2 if you’re petite.
Matching thread*
1 set of aluminum sling rings. I got mine from slingrings.ca, through eBay. If you’re in the States, check out slingrings.com instead. In my research, I also heard a few DIYers found appropriate rings at their local hardware stores, meant for harnessing horses.
A sewing machine. Or a needle if you’d like to hand sew.*

*If you choose a type of fabric that isn’t going to fray much, you won’t need to worry about these items. This can be a no sew project.

Cut your fabric to size.

Tip: To make sure you get a straight edge, snip the fabric, then tear it instead of cutting the rest of the way.

Hem the ends. If you’re lazy like me, don’t bother ironing the finished edge.

Thread your rings.

Up through both.

Down through the bottom ring and over the top ring.

Place the ring on your shoulder with the short tail under the long one and the fabric hanging down your back. Without twisting it, bring the larger tail across your back to your front to thread the rings again at the front.

Pull the tail up through both rings, then down through the bottom ring.

Pop your baby in!

Isabel doesn’t love it. I wish otherwise, but she’s not a huge fan of being worn. I don’t know why and I don’t really know how to change it. I’ll keep trying out this sling, slipping her into it a few times a day and see if it grows on her or not. If not? So be it.

(Suggestions appreciated!)

(This post has been shared in the #BeAwesome link party.)

5 Comments

Filed under Uncategorized

A Garage Sale Day and Some New Treasures

Our neighbour is moving. (Sadly, not the neighbour that caused all the drama a couple months ago. The neighbour on the other side.) They are neighbours who welcomed us onto the street with open arms three years ago. Neighbours who invited us to backyard barbecues and shared flats of vegetables for our gardens. Awesome neighbours. I’m going to miss them.

This past weekend, they took over our mutual driveway with tables, desks, and dressers, and filled them with all the trinkets of a yard sale, a lifetime of collections her father had tucked away in the basement. We added in a table or two of our own, our meager offerings paling in amount and value. In exchange for a little help, they happily let us peruse their offerings, and, at the end of the weekend, I was pretty thrilled to find a few little treasures to tuck away myself.

Two books for Isabel: a mint condition Golden Anniversary Edition of The Wind In The Willows and The Children’s Illustration Book of Poetry.

A rocking chair to sit next to her crib, a magic thing that seems to put her to sleep the moment I settle in with her tucked in the crook of my arm.

A stack of copper plated pots. These had caught the Husband’s eye early on and, when someone else offered up $5, he jumped in with his own offer of $10. When no counter offer came, our neighbours set the pans aside for us and promptly refused to take our money.

The only one with any markings is the largest frying pan.

Towards the end of the day, my eye fell on a little yellow box. It was a little dirty, unused for a long time. A Betty Crocker Recipe Card Library. Inside, little recipe cards full of recipes from the 1970s, ranging from ridiculous, to disgusting, to classic, to potential new favourites.

The yard sale itself blew me away. Saturday seemed like a steady stream of people poking through tables of knick knacks, searching for the valuables among the rest. From 8 to 1:30, when rain clouds threatened and we all closed up shop, the little garage sale aisles were full of treasure hunters. We didn’t have much in the way of treasure to bring them in and, with the way I insist on a more-or-less knick knack free home, we never will, so it was fun to add our few things to our neighbour’s piles just so we can experience it.

2 Comments

Filed under neighbourhood, thrifting

This Dusty Kitchen: BBQ Meatloaf

The very first time I had meatloaf, I was in university. It seems late, I know, for a first taste of something so many consider comfort food. Meatloaf can be inconvenient, time-consuming, requiring far more preparation and effort than my mother, a hard working dairy farmer, had the patience for. Meatloaf may be a classic, but it’s certainly not quick and easy.

So, the first time I had meatloaf, I was in university. My best friend and I had decided to step into cliched roles for a night, taking over my boyfriend’s kitchen to make dinner for the house of five guys. She brought the recipes, each one carefully selected from a ginormous binder of family recipes, passed down from the kitchens of her grandmother, aunts, and mom. Meatloaf, bread casserole, a salad to round it all out. That meatloaf blew me away.

Of course, I demanded the recipe. She happily, carefully, wrote it out on a little square note card. I promptly tucked it away someplace safe and lost it. Years later, I found it again, during some move or other and, in a fit of proper organization and determination to not lose it again, paperclipped it to a page of my recipe book and wrote it down in my own hand for extra reassurance.

And yet, I didn’t make it. It turned out I kind of agree with my mom – meatloaf is inconvenient for more than one reason. 1) We buy our ground meat frozen. Defrosting it enough to mix is a pain. It’s far easier to defrost it halfway, then cook the rest of the cold out of it. 2) Meatloaf takes a really long time to bake. An hour and 20 minutes for this recipe! That means making it requires plenty of foresight so I can start on time so we can eat before bedtime.

But, this recipe is good. Like, really good. So, when Isabel went down for her third nap of the day at 3:30, and I had actually managed to clean my kitchen so that it was in perfect cooking condition during her earlier nap, and since I actually had all the necessary ingredients, I pulled out that little note card and followed my best friend’s instructions.

It was just as good as I remember.

Jen’s BBQ Meatloaf

Sauce:

1/2 cup tomato sauce
1/8 cup white vinegar
1/4 cup packed brown sugar
1/2 tsp dry mustard

Mix together in a small bowl and set aside.

Meatloaf:

1 lb ground turkey
1 egg
1 small-medium onion, chopped
1/2 green pepper, chopped
1 cup quick cooking oats
3/4 tsp salt
1/2 tsp pepper
1/2 tsp dried parsley flakes
1/2 tsp Montreal chicken seasoning
1-2 cloves garlic, chopped

Mix together all of the meatloaf ingredients. Press into a loaf pan, a 9 by 9 dish, or, like I did, split up between two small casserole dishes.

(If desired, and if your family is small enough to be satisfied with just 1/2 lb of meatloaf, freeze one of those casserole dishes. This is the perfect thing to tuck away in your freezer for whenever you might need something to throw in your oven with no prep.)

Pour the sauce over the meatloaf.

Bake at 350 degrees for an hour and 20 minutes, or until fully cooked.

2 Comments

Filed under food

Waking Up

Mornings are my favourite time of day now. Isabel wakes up slowly, often content to coo and stretch in her crib for a few minutes while I pull on pants and tuck fresh nursing pads into my bra. She’s slowly teaching me her night time schedule: eat from 9 to 11, then sleep until 2 am, or 3 if I’m lucky; up again at 6, 7 if her diaper isn’t too dirty; back to sleep for a couple more hours, preferably snuggled against me in my bed, but she’s ok with the crib too.

Night times are easy. Predictable. Mornings are sweet. Contented.

(Afternoons, evenings? Not so much.)

1 Comment

Filed under baby, Isabel, Photography

Garden 2014: Neglectful Success

Back in May, during planting season, I dragged my pregnant self into the garden and, after some half-hearted prep work, planted my vegetables for the year. I didn’t plant a lot, especially in comparison to other years, but I planted enough to feel like I had a garden, while acknowledging the very high likelihood that weeding and watering would be the first thing to face the neglect of new parenthood.

So far, this has been the best year for neglected gardens. Like a self-fulfilling prophecy, the weeds grew up around my tomato plants and the crab grass started to choke out my carrots. But, despite the neglect, my garden has been surprisingly, delightfully thriving. We’ve had just the right combination of rain, sun, and heat to push almost all of our vegetable plants into high production. Our tomato plants are heavy with fruit, our zucchini full of blossoms, even our lettuce hasn’t bolted and become too bitter to eat in excessive heat for the first time since we started planting gardens.

These photos aren’t pretty. You aren’t going to want to pin them to your gardening inspiration Pinterest board. But somehow, this neglected garden has been one of our most successful ever.

I think I’m going to need lots of suggestions for cooking with zucchini… There are two of these plants!

This tangle of tomato plants contains dozens of proper sized beefsteak tomatoes waiting to ripen as well as little cherry tomatoes, turning beautifully red.

Our green beans have taken well to our trellis, even choosing to climb further up the branches of the tree at the back of the garden. And our lettuce? It likes this spot, despite the weeds encroaching on its space.

I think there’s a lesson here in this garden. I didn’t take it very seriously this year. I planted seeds and a plant or two purchased from the garden centre, and then I sat back and let the garden do its thing, while my focus was elsewhere, on other more important things. So far, it hasn’t been a disaster. So far, while I’ve been enjoying the snuggles and struggling through the crying fits of new parenthood, the garden has taken care of itself.

So too can the rest of the world.

1 Comment

Filed under garden, gardening